The Benefits of a Freestanding Bathtub
A freestanding bathtub can be a luxurious addition to any bathroom. Not only does it…


A freestanding bathtub can be a luxurious addition to any bathroom. Not only does it…

When it comes to bathroom design, every detail matters. From the fixtures to the accessories,…

LED rain shower heads have become increasingly popular in recent years. These innovative shower heads…

When it comes to creating a cozy and inviting atmosphere in your bedroom, lighting plays…

A freestanding bathtub can be a luxurious addition to any bathroom. Not only does it provide a stunning focal point, but it also offers a range of benefits that make it a popular choice among homeowners. Whether you are renovating your bathroom or building a new home, a freestanding bathtub is worth considering. In this…

When it comes to bathroom design, every detail matters. From the fixtures to the accessories, each element contributes to the overall aesthetic and functionality of the space. One often overlooked but essential component is the bathroom mirror. While traditional mirrors serve their purpose, a LED bathroom mirror offers a modern and stylish alternative that can…

LED rain shower heads have become increasingly popular in recent years. These innovative shower heads not only provide a luxurious showering experience but also offer a range of benefits that traditional shower heads cannot match. In this blog post, we will explore the features and advantages of LED rain shower heads, as well as provide…

When it comes to creating a cozy and inviting atmosphere in your bedroom, lighting plays a crucial role. A well-chosen night table lamp can not only provide the perfect amount of light for reading or navigating your bedroom at night, but it can also serve as a stylish accessory that enhances the overall decor of…

When it comes to decorating your child’s room, lighting plays a crucial role in creating a warm and inviting atmosphere. Children’s pendant lights are a popular choice for adding both functionality and style to the space. With a wide range of designs and options available, it can be overwhelming to choose the perfect pendant lights…

When it comes to creating a cozy and inviting space for your child, lighting plays a crucial role. A well-chosen children’s wall light not only illuminates the room but also adds a touch of whimsy and personality. With so many options available in the market, it can be overwhelming to find the perfect wall light…

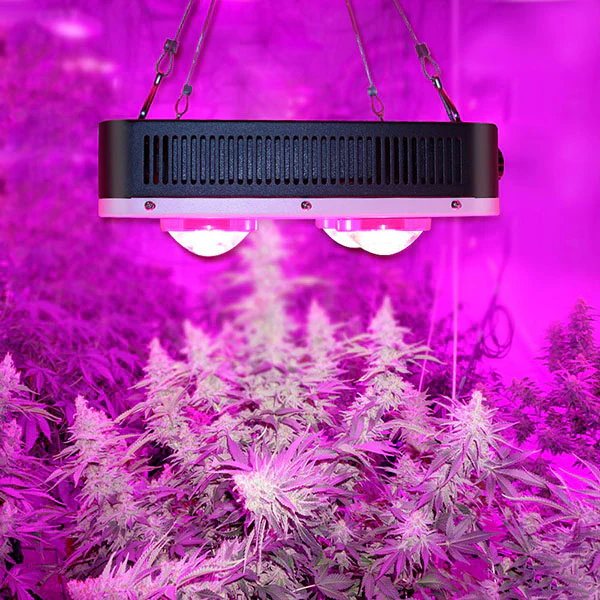
When it comes to indoor gardening, one of the most important factors to consider is lighting. Plants need the right amount and quality of light to thrive and grow. That’s where COB LED grow lights come in. COB, which stands for Chip on Board, is a type of LED technology that offers numerous benefits for…

A lava lamp is a popular decorative item that adds a unique and mesmerizing touch to any space. However, like any other electrical device, it may encounter some issues over time. If you find yourself in a situation where your lava lamp is not functioning properly, there are a few steps you can take to…

3D LED lamps are a popular choice for adding a touch of style and sophistication to any space. These lamps use LED technology to create stunning three-dimensional designs that come to life when illuminated. Whether you’re looking for a unique lighting solution for your home, office, or as a gift for someone special, 3D LED…

LED light up flowers are a popular and innovative way to add a touch of beauty and ambiance to any space. These artificial flowers are designed with built-in LED lights that illuminate the petals, creating a stunning visual display. Whether used for decorative purposes or as a unique gift, LED light up flowers offer a…